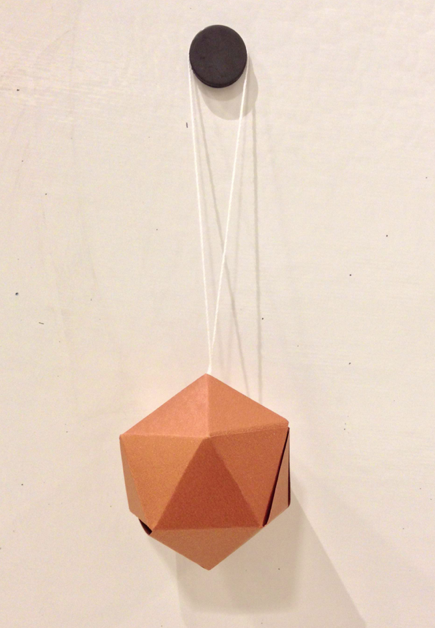
During December’s Open Studio visitors got into the holiday spirit with paper crafts, creating their own holiday cards, stockings, and ornaments from scratch. Participants could select from a number of shape templates and a variety of festive paper and materials to customize their own ornament. By carefully tracing, cutting and folding, a flat piece of paper then transformed into a three-dimensional shape. Below are the supplies and instructions you’ll need to try this geo-tastic activity at home!
 You will need:
- Stock or a thick piece of craft paper. You can choose a more decorative paper or decorate it yourself with art materials of your choice
- A ruler
- Scissors
- A Pencil
- Tape
- String
Instructions:
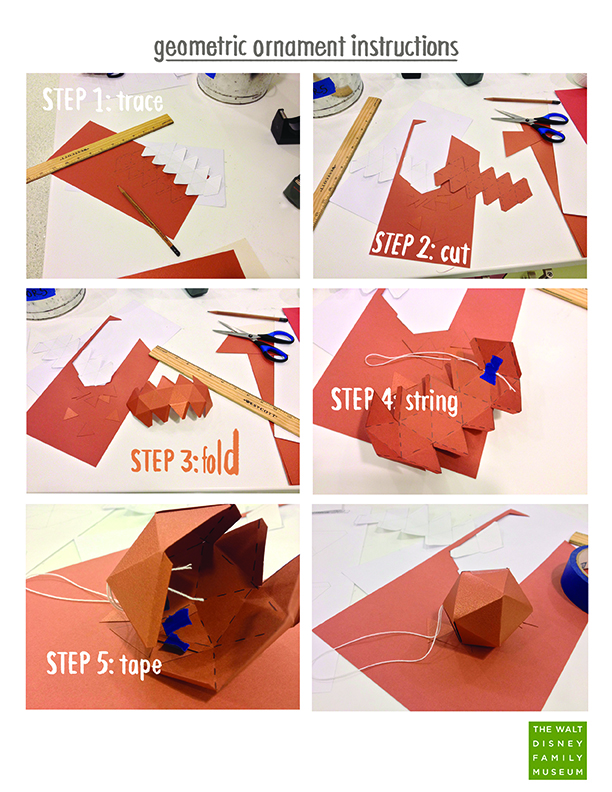
1. Print and cut out the below template. Make sure to cut along all outer lines that will need to be folded.
2. Trace the template onto the BACK side of your paper, and be sure to copy over the dotted fold lines as accurately as you can (this is where your ruler comes in handy).
3. Cut around outer lines just as you did the template, then crease along the dotted lines.
4. Begin to fold the shape together and determine where you want to attach the string, then tape it into place on the inside. This is also where you would want to add any last decorations to your ornament before forming its’ shape.
5. Begin folding the sides together, using tape to fuse them together on the inside creases (so that the tape isn’t seen). Once you get to the final fold, close up your ornament with a final piece of clear tape on the outside crease. Voila! You now have your completed ornament!
Template | Step-by-step Images | Source

Jenna Calvao
Learning Center Studio Technician